Firmware
For the AUTD3 device to operate correctly, a version of the CPU / FPGA firmware compatible with the SDK must be flashed.
Firmware updates are performed using the Firmware tab of the GUI console autd3-console.
See Console for how to obtain it.
Prerequisites
Section titled “Prerequisites”Flashing the firmware requires the following external tools.
In each case, the executable must be on the PATH (on Windows, the installation location is detected automatically).
- FPGA flashing: Vivado (
vivado/vivado_lab) and a XILINX Platform Cable for the connection.
- CPU flashing: J-Link Software (
JLink/JLinkExe) and a J-Link Plus probe via a J-Link 9-Pin Cortex-M Adapter.
Flashing Procedure
Section titled “Flashing Procedure”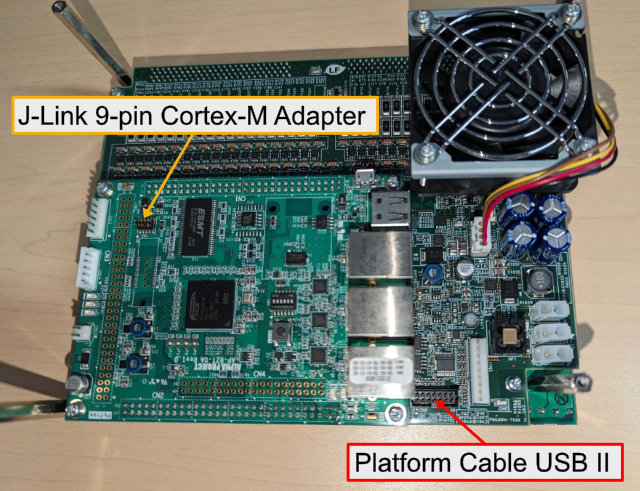
- Turn off the AUTD3 power
- Connect the cables described above. The connection points are as shown in the figure above.
- Turn on the AUTD3 power
- Launch autd3-console and open the Firmware tab.
- Select the version to flash from Version
- Choose the target to flash under Target (
Both/FPGA/CPU). - Press Flash. Progress is shown in the log at the bottom of the panel. Flashing takes several minutes.
- After flashing completes, power-cycle the AUTD3 to apply the new firmware.